Showing posts with label Wine Making. Show all posts

Leading Up to Bottling Day Part 1 Grunt Work

Leading Up to Bottling Day Part 1-Grunt Work
      It's that time of year again when the whites, fruit and rose' wines are to be bottled in a few months. I typically bottle these wines 8 months after harvest unless they aren't clear or have some other kind of problem that needs time to be solved. My reds are bottled later in the year so they have sufficient time to develop before they go into the bottle.

We're Gonna Need More Bottles
      In order to prepare for bottling, there are many steps that lead up to the day where I have my friends over to help me bottle my juice. Over winter when it's too cold to do really anything, I take advantage of that time by de-labeling and cleaning the bottles I need. They are soaked in hot water for a period of time which loosens up the labels so they can be scraped off. I like to use a putty knife to scrape the labels off and steel-wool will make short work of any residual glue and then a sponge to remove any dust or anything else. I then use a bottle brush to loosen and debris in the bottle. Then they receive a good rinse with a water jet sprayer and are hung on the bottle tree to dry. The bottles with label glue that can't be removed because it was developed by NASA I chuck in the garbage because ain't nobody got time for that! Once sufficiently dry I box them up, tape it closed to keep any dust out and then they await bottling day! On a good year I'll only be dealing with bottles with my glue-stick labels on them which come off with just a spray of hot water.


                                                     All Dressed Up But Nowhere to Go..

    I work really hard on making my wine, so I like them to look good too. During the winter between cleaning 1.2 million bottles (it feels like that anyway) I use Adobe Photoshop to make my labels. The color scheme of the label helps me decide which shrink capsule to use and I order accordingly  Sometimes I like old black and white photos of something odd or I just use my own photography to create my labels. I'm not artistic in this manner but in my opinion i get some cool results.

      The Finishing Touch
      Closer to bottling day, the wines I plan to back-sweeten will be tasted and evaluated for balance.  But, before I touch the wines, the free SO2 level is tested because the wine will be exposed to O2 to some degree as a result of taking samples. If there are no SO2 emergencies, I'll add the necessary sulfite after sampling is finished.

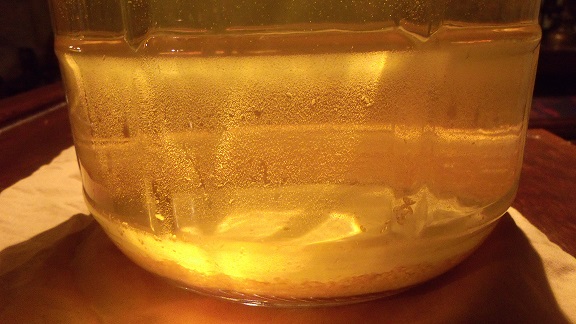
      To sweeten the wine I will take a large enough sample to measure the specific gravity and take a few samples along the way. I'll add small amounts of sugar to the wine sample, stir it well and the wife and I taste and seek out a balance between the acid level and the sweetness. If the wine is out of balance it will either be too sweet which will eliminate the perception of acidity on the palette making it flat and flabby in flavor which results in a wine that is not at all refreshing on a hot summer day. Too much acid with make it overly tart and not very pleasurable to drink! A nice balance between the two is what is needed and we do a pretty good job of finding that happy place. If I tried it by myself it would come out too sweet and give you diabetes! Seriously, try my 2013 raspberry wine if you don't believe me.. Oh and bring insulin..
Adding sugar poco a poco until a nice balance is found.
   Once we've reached a happy medium, I measure the new specific gravity and write it down for future reference. We typically sweeten 3-5 wines at a time so actually sweetening the whole batch rarely gets done in the same day. Once sampling is done, the wines have their sulfite levels adjusted and the vessels topped up until I get around to adding the sugar. If I haven't done it yet I will add potassium sorbate at a rate of 0.75grams per gallon of wine. Some folks may add 1gram per gallon but I want to make sure it won't be detected on the palette so i stick with 0.75g. Potassium Sorbate is added to wines to be sweetened to prevent a renewed fermentation. This additive will not stop fermentation but will actually coat yeast cells and prevent them from making daughter cells. The existing yeast finish their life, die and settle without reproducing. This ensures your sweetened wine is stable and won't pop corks or blow up your bottles. NOTE- when doing malolactic fermentation, potassium sorbate is not recommended. A geranium odor will be created in your wine which would be a major fault. 

       Once it is time to sweeten the wines, I use Fermcalc to determine the amount of sugar to add to the whole batch. You enter the existing specific gravity (SG) and the desired SG, the volume of wine you're working with and it tells you how much sugar to add. At first, I typically add 3/4 of what I need (can't trust computers, ever seen Terminator?) so i don't over-add. Fermcalc is a useful Guide so keep that in mind. Just add most of it and check your SG and make sure you're on the right track.

      Some folks like to make a simple syrup by dissolving the desired amount of sugar in water. This is fine but I prefer to  rack a volume of wine to a stainless steel pot and add my sugar to that and gently stir until the sugar is dissolved. Some wine will need removed from the vessel before returning the sugary wine because the sugar creates more volume. I then stir the whole batch and once again ensure sulfite levels are in the proper range , top up the vessel and clean up. Up next is filtration..


Leading Up to Bottling Day Part 2-Filtration

Leading Up to Bottling Day Part 2-Filtration

Filtration
      Now that the wines have been back-sweetened, I can now filter them. My filter of choice is the Buon Vino mini jet. This little unit is easy to set up and clean once filtration is finished. The filter is used purely for aesthetic purposes only and will not filter out yeast cells or bacteria. Sterile filters are available to the home winemaker, but I don't see the need for it in a home wine making setting, plus I stabilize my sweet wines with potassium sorbate to avoid a renewed fermentation in the bottle.

The Process
      When setting up your mini-jet the first order of business is to sanitize the unit by soaking the plates and tubing in the sanitizer of your choice. I then use a spray bottle full of sanitizer to spray down the unit where wine will be in contact. After that I run some sanitizer through the actual pump to ensure the inside is nice and clean for the wine. Once this is done, you give your filter pads a soak in water for 60 seconds before installing them into the unit. Once the filter pads are in and the plates are screwed down tight ( a wise man once told me, in reference to the black tightening knobs, you are to reef upon them until you fart. I follow this advice.) I run 6 gallons of water through the pads to remove the paper taste from the pads. This also removes any particulate that may be hiding in the pads.

      After rinsing the pads with 6 gallons of water, there will be residual water in the filter unit and in the pads. You can:
1. Disconnect all tubing and blow into the outlet and remaining water will come out of the other inlet (Not sanitary, home wine making at its finest.)
2. Just tip the unit to get as much water out as you can and start running wine through it. Water will come out first which can be directed into a pitcher until wine starts coming out which can then be directed into the receiving carboy or tank.  You don't to just allow the water to go into your wine vessel because there could be up to a 1/2 cup of water within the filter unit which would dilute your wine's flavor.

Let's just Break All the Rules!  

     The nice folks at Buon Vino do not want you to break your filter and come complaining to them. Because of this they have set fourth guidelines they recommend to be followed to avoid overheating your pump or clogging the filter yadda yadda yadda (ever seen Seinfeld?) But, filter pads cost money and when they say you should only filter 6 gallons of wine through each set of pads; what they really mean is 15! Yes, that's right 15 gallons of clean, clear wine. I'll say it one more time-clean, clear wine. We can break some rules but we should still be careful. By the time I filter my wine it has been racked several times and it's so clear you can read a newspaper through it. Why am I still filtering if my wine is that clear? Well, no matter how clear it got from time and settling, it can get a nice shimmer in the sunlight after filtration! I only filter my whites and rose'-style wines. Reds don't really need it in my opinion. And if I do filter reds it's through a coarse filter just to remove anything really obvious that may be floating around. Some wines may be too thick and you'll need to perform a step filtration to be able to filter with finer pads. For example, my black raspberry wine is pretty thick, so I would filter it through the #1 first and then again with the #2 pads so the wine will actually go through the finer pads.  Sometimes you can only get 10 gallons through a set. If you notice the flow slowing down, just stop the pump replace the pads and move on! For example: If you have 30 gallons of wine to filter, get 3 sets of pads just in case you need an extra set. You're still saving around ten bucks that can be spent elsewhere.
The Mini-Jet gets great results

      A Slight Cool Down
      After filtering 15 gallons at a time i do allow the mini-jet to chill for a bit. But it doesn't slow the flow of the day down at all, Because by the time I'm ready for the next round is has had sufficient time to cool. You could even filter 15 gallons, and allow the pump to cool while you're doing sulfite testing and additions to the just filtered wine.  Which brings me to my next point.

Post Filtration Sulfite Testing and Adjustments
      Filtration can be an oxidative affair, especially with a filter like the mini-jet. But this is no problem if you keep up on the sulfite (SO2) levels. I know my SO2 levels were good because I tested them after back-sweetening, but I'll also need to test again after filtration. I use the Vinmetrica unit to perform pH and SO2 testing. You can have results in as little as two minutes; which is great during a busy filtration-day. I shoot for 0.8 molecular SO2 for whites and fruit- wines and 0.5 molecular for my reds.

Fin
Once the wines are filtered and SO2 levels are good, the wines await one more SO2 test before bottling day. 

One More Thing
Occasionally the Mini-jet will need lubricated to keep it working properly. The mini-jet can actually pull wine out of the donor carboy without being primed. I didn't believe it at first but my man Sicilian Prince (http://howtomakehomemadewine.biz) made a video just how to do it and the results are amazing! This is a must if you own a mini-jet! I do it every season and have great results. See the video here and drop him a like- https://youtu.be/He7zQrAqyJw

-Up Next Bottling Day!

Leading Up to Bottling Part 3- Bottling Day!


Bottling Day!

      Finally the time has come to bottle up the juice I’ve tended to for the last year or so. In my cellar bottling line, I employ some friends to help me get the job done. Below is an outline of each station the bottles go through to be filled. One person will man each station and it goes pretty smoothly. After a 100 bottles or so we take a little break for meatball hoagies and some other snacks. I also put out previous vintages and beer too. This little event at my wine cellar attracts friends and family alike. Folks just seem to be interested in the process! Plus I can employ those folks to because everyone wants to take a turn with the corker or bottle filler etc...

Bottle washer
I have built a bottle washer out of a shallow tub, water pump, and the bottle rinser base and rack from morewine. The rack is filled with 12 bottles, then placed on top of the washer. The pump is turned on with the flip of a switch and the bottles have a sulfite/citric acid solution circulated through them. The solution then drains back into the tub. This sanitizes the bottles and they do not need to be rinsed after.

Nitrogen Purge
The rack of bottles can then be lifted off the washer and placed on the purging base. The purging base is just another rinsing base but is connected to a nitrogen tank instead. The bottles are gassed to purge the oxygen out of the bottles. This does a couple things: It significantly reduces oxygen pick-up sustained to the wine and reduces bottle shock. The flow meter is set pretty high and purge the bottles for about 30 seconds before passing them on to the bottler.

Bottle Filler
The bottle filler I use is a dual-spout gravity style filler. The vessels are placed on an elevated plane and a siphon is started. Once the reservoir of the bottle filler is full enough, the spouts can be primed and remain that way until the vessels are empty. The bottle is placed under the spout and placed on the shelf while it fills. Once the bottle is full, the flow stops and the bottle is removed and passed to the corker. This makes quick work of bottling. Eventually I would like to have CO2 flowing into the reservoir blanketing and protecting the wine to better help with oxygen pick-up during the bottling process.


Corker
Before the bottle is corked, it is checked for the proper fill-level (about 0.75”- 1” from the bottom of the cork once it’s inserted.)  Before a cork touches the corker, I spray the driver and jaws with 90% alcohol to sanitize it. The cork is driven home and passed to the shrink capping station. I use the Portuguese floor corker for this job. When dong more than 50 bottles at time, this is the corker to use. The hand held corkers are difficult to use and get poor results.

Shrink Capping
I use a pot of boiling water to apply the shrink caps. Simply put the cap on, and dip the neck of the bottle into the water for a few seconds and cap will shrink uniformly around the bottle. I plan to upgrade to a heat tunnel shrink capper now that I have kids running around the bottling area. Plus, anytime someone bumps the table the water is disrupted and spills. 
 

Labeling
Labeling is typically done later after everyone has left. I like to do it myself to make sure they go on right. This is no offense to my crew, but I serve wine and beer during bottling day and well you know, some may go on crooked after a while! I use a glue stick to apply my labels. By the time the caps and the labels go on, the bottles are looking pretty snazzy in my opinion!

Done
Once the bottles are filled, and dressed, I allow them to stand upright for a few days before laying them down to age. This is so the corks won’t leak and any pressure within the bottle will equalize prior to laying down to age.


All done! Now my carboys are free to accommodate more wine in the coming year.


Post Oak Aging Results and Impressions

      Post Oak Aging Results and Impressions

      Today I racked the Leon Millot wine off the American oak it's been aging on for sometime. This year instead of being timid and not adding too much oak for too long, I decided it's time to experiment and see what Stavin oak beans can really do and see how gracefully my reds take on oak. The results were surprising indeed.

Lets back up a bit. 
      The 2015 vintage was the first crop of red grapes I got from my vineyard.  Frontenac, Leon Millot and corot noir. All received just 1oz of french oak for 1 month with the exception of corot noir, which received 1oz of American oak for the same time frame. This minimal oak effort was done for a reason- not to over-oak the wine! (And after an oak bench trial I decided I liked the 1ox rate best) 6 months after bottling that wine the oak character is well blended to an almost non existent flavor. The wine is delicious but I like a little more oak in my reds.

Fast forward to this year, I have a different plan- add more for longer! 
Leon Millot

The Leon millot received : ( really living on the edge with these additions but hey- poco a poco.. )

Vessel 1- 1.25 Oz for a full 2 months 
Vessel 2- 1 Oz for 3 months 
Vessel 3- 1oz for 2 months - ended up adding another 0.5oz for another 2 weeks.

-1.50oz: Just after 1 month on the oak I felt the oak level was right where it needed to be. It had moderate to intense oak on the nose and palette. 

-1oz. After about 6 weeks on this amount of oak- The oak aroma is not overwhelming, which is good. I left it for another two weeks for a total of two months. In general the wine has intense dark fruit flavor with a slight acid bite. The acid bite could probably be fixed with some degassing or cold stabilization. But Cold stabilization may put the pH at an unhealthy level. Two weeks later I tasted again and decided it could use another 1.5 oz of oak. I toss it in and come back to it in another two weeks later and decide to rack as I am happy with the oak levels of this wine. The oak aroma is actually complex as if there are different layers to it. This will no doubt integrate over time but it's interesting to  experience it at this point in the process. The oak is not overbearing on the palette either. This could actually use more oak! The wine is a little drying on the back end (tannin?) The acidity was a concern at 0.82% but with a final specific gravity of 1.000, it is actually quite balanced. I plan to allow this settle for a month before doing tannin bench trials.

In the end I decided to blend all three together into one wine. Why not bottle each differently you ask? Well, now the wine is off the oak, a short blending period (1 month ) will be done and then tannin bench trials will be performed. I didn't want to do bench trials of the same wine three different times; so I blended them and now I have one wine and trials will be easier. 
The Frontenac Received:
1.25 oz of french oak, not to much more than last year but I left it on longer than before by a month.
   
Frontenac
  The oak is blended in nicely but it's out front a bit. This is fine, it will integrate over time. Blackberry and vanilla on the palette along with some slight chocolate tones if you really aerate it. The finish is long with some bright(ish) acidity on the back end. With T.A. of 0.78%, the wine tastes little wild. This could no doubt be fixed with some degassing on its own over time or I could intervene and do it myself (Trapped Co2 in the form of carbonic acid in the wine makes it taste more acidic than it actually is, and gives you an off pH and T.A. measurement if your test sample is not properly degassed. This trapped CO2 can give a white wine brightness and bring excitement to the flavor, but not so much for a dry red.) Otherwise this wine is coming along well and I am happy with it so far. 

The Corot Noir Received:
1.5 oz of American oak for 2 months.  Upon tasting this wine out of the carboy, the flavor and the nose were dumb. Meaning the nose was nonexistent and the flavor was rather watery. I'm not sure how this could have happened. I am tasting at
Corot Noir
55F in the cellar which most likely could have muted the flavors. Since this was the case I filled a glass half way and allowed oxygen to do its thing to the wine. After about an hour a perfumy, almost flower-fresh wood smell came through-interesting and weird! I then took it upstairs to a warmer place and i am allowing it to chill for a few hours before making a final judgement call on the quality of the wine. I'll get back to you!

     ***edit***  Ok so after the wine sat out at room temp (not in a chilly wine cellar) for around 8 hours,  the wine finally showed itself in a positive way. The perfumy aroma has been reduced. As for the flavor the acidity came out giving the wine life (the cold muted this aspect) and the wine has nice body to it! Now I'm not scared this wine will be poor. Corot noir is weird, it takes its time to find itself and in the end comes through as a tasty wine. Maybe that is just in my case, but that is my experience with it so far. 

Did I learn anything? Why yes I Did! 
1. Just 1 Oz of oak- no matter the time frame just isn't enough. It's delicious off the bat but the oak ages out.
2. Keep un-oaked wine in case you over oak. This builds confidence and allows you to add oak, be an artist, mess up and fix it! The funny things is, I added up to 1.5oz of oak and it STILL isn't over-oaked. 
3. Stavin offers different forms of oak. Whether it be barrel head, heavy toast, medium toast, or savor oak. When using these different forms, the oak aroma actually has a complexity to it. This creates interest in the nose of the wine. This will no doubt blend over time but I feel it'll make your wine more complex in the end. Fin...

My Quest for Oak


My Quest for Oak
Oak Cubes photo:  stavin.com
            When I started making wine, I typically made fruit-based wines such as: Concord grape, black raspberry, black berry, apple, pear and any other fruit I could pick wild. One day I decided to oak age a black berry wine I had made. I thought: hey, its red, it can be oaked! I decided on Hungarian oak based on the flavor description on a website. An important thing to note here is I used oak "chips." The result was the wine was over oaked with harsh tannins and an aggressive oak flavor (pour some black berry wine over an oak board and then start gnawing on it.. yeah, that bad.) Actually I still have some of that wine and it is still over oaked!


Fast forward a few years and finally the red hybrids I had planted are finally producing delicious grapes! Time to make an oaked, dry red, but wait oak? Oh boy, here we go again. I was afraid to oak the wine I had worked so hard growing, making etc. Luckily I had found Stavin Oak Cubes (or beans if you prefer.) According to the Stavin website (please visit the site, it's full of great info: stavin.com) The Oak Bean is a high quality fire-toasted solution with minimum 3-year seasoning designed to enhance your wine programs during fermentation, aging or touch-up before bottling.
The source photo: stavin.com


 At first I was unsure of how much to use. They recommend 2oz of oak cubes per 5 gallons of wine for a minimum of two months; and recommended to taste often. That sounded like a recipe for over oaking so I decided to email the company and see what they had to say. They reported two ounces of oak in five gallons of wine could possibly over - oak the wine. But it all depended on the wine maker’s perception of oak; some like more and some like less (typical wine maker answer ha!) He offered to send a trial pack of the three different oaks they offer in their various toast levels: French, Hungarian, and American. Bench trials can then be performed to decide on the best approach. In each sample pack provided is enough for one bottle of wine. Once the oak is added the, wine is left to sit for a period of time and then it is tasted. You then choose what you like best and scale it up to the rest of the batch. Once I decided on the amount of oak I liked I emailed Stavin once more on how to scale it up.
The oak being seasoned
 photo: stavin.com
I ended up adding up to one ounce of oak beans per five gallons of wine. Once added, I waited two weeks before tasting and decided it wasn’t enough and waited another two weeks. At this time I decided to pull the oak as not to over-oak the wine. The flavor after this was excellent with just a hint of oak, success! The oak seemed to punctuate everything good about the wine. But after a year in the bottle the oak is essentially non-existent. The wine is still delicious, but the oak is something left to be desired. Fast forward again to this year, I am now more confident and not afraid to oak my wine. This time I am trying one ounce for two months and 1.5oz for 1-2 months. This time I will taste and wait until the wine is a bit over-oaked and then rack it off the cubes. This way some of the oak flavor will dissipate with age and what will be left should be in the range of what I’m looking for.


This is the One
Stavin Toasting Room photo: stavin.com
            For the foreseeable future, I plan to stick with Stavin products. They have proven to be an excellent complement to my wine. Once I finally get a barrel and it goes neutral, Stavin will be used to oak the wine while the barrel provides the beneficial micro-ox that a red wine needs.

            I've gained so much confidence in using oak I have started oaking my sparkling pear ciders. I just use American medium toast-plus oak, 1oz per 5 gallons of cider for one month. This gives the cider a slight kiss of oak which is a nice compliment to the cider (which is a dry cider at a final specific gravity of 1.000 with a T.A. of around 0.65 %.) I'm even considering taking the used oak beans from my reds and adding those to a blueberry wine to see what that does. I’m sure the oak cubes still have something to offer after only being in my reds for around 6 weeks. 

           
Oak cube packaging photo: stavin.com
 
Just So You Know: You will see on winemaking forums, people like to soak, boil or rinse their cubes prior to adding to the wine. I on the other hand just dump the cubes right in the carboy (oak dust and all.) I want everything those little cubes have to offer, and it's quite a lot! the oak cubes come in a safe, clean package, no need to soak them in a sulfite solution or boil them or have them blessed by a priest. Just pour them in and taste every two weeks until you you're satisfied with the flavor. Good Luck!


Note: For an in depth look at Stavin and their product, please visit stavin.com. They have solutions for pros and home winemakers alike. 

Status-Post Cold Stabilization

Tartrate crystals on the walls of the carboy.
      Today the wines come out of cold stabilization. As you can see in the picture quite a bit of tartrate crystals has precipitated out of the wine; therefore the wines should be stable in the bottle once they are chilled.  I bring the carboys in 24 hours before I start testing them so they can get up to cellar temperature. If they are too cold, I may get inaccurate results from any testing I do.

The Wine Lab

Before I rack the wine, I test the pH and free sulfite levels. I don't bother with acid (TA) testing with these wines because I know the acid level is on the higher end, and I back-sweeten these wines to balance out the flavor. My dry reds on the other hand, I measure pH, free SO2, titratable acidity, specific gravity (to monitor fermentation etc.) and MLF completion. I do this to ensure a balanced product is being made, I taste it too by the way! I  add any needed sulfite to bring the molecular sulfite up to 0.8 (this is for whites, I also use this for fruit wines too.) Now they can just finish clearing and age until spring when I'll start back sweetening and filtration. If the wine has not cleared up after a while I  try pectic enzyme. If that doesn't work I try sparkolloid; which usually does the trick. As the wine ages, I will monitor the sulfite levels and adjust accordingly. In a couple weeks I plan to rack my reds off of the oak cubes. At that time I will evaluate the flavor and talk a bit about the oak I use.


Cold Stabilization (CS)


Wine in cold stabilization.
Complete with snow!
      Below is a carboy of Niagara White that has gone through cold stabilization. Note the crystal formations around the carboy and on the bottom. CS is important (mostly for whites, and sweeter grape wines) because when wine is exposed to low temperatures,  tartrate crystals precipitate out and fall to the bottom giving the appearance of broken glass in the bottle, and this may freak out some folks into not wanting to drink it. CS also helps to lower the acidity (TA) and raise the pH of a wine that may have a slightly higher TA level than is desired.

      My approach to CS is to get it to around 28-30F for 2-4 weeks. No one has their fridge down that low and hopefully no one will put my wine into a freezer! Brrrrr! I do this for whites and sweet red grape wine because those are the wines most likely to be chilled prior to drinking as compared to dry reds. These are typically consumed at cellar temperature and only need to be exposed to cellar temps.

      Once the wine is done with CS, it is tested for Free Sulfite levels. The necessary SO2 is added to the receiving carboy and the wine is transferred or "racked" off of the tartrate crystals into a clean carboy.

See here for a in-depth look at CS - https://www.extension.purdue.edu/extmedia/fs/fs-54-w.pdf


Make It Fizz!

Make It Fizz! By: Jeff Shoemaker  This article originally appeared in the  Jun/Jul 2019 issue of Winemaker Magazine    Making ...